Cart is empty
Recent Blog Posts
-
10/10/2025VIDEO: How often does a Survival Sock get knit at NEAFP?
-
09/12/2025NEW Downloadable Content: Alpaca Dinner Time Coloring Page
-
08/15/2025Reviews: What People are Saying About Bouclé Lined Mittens!
-
08/15/2025Get Ready for NAFD! 5 Ways to make the most out of your Open House!
-
06/26/2025NEW Downloadable Content: Find the Difference Activity Page
-
04/25/2025VIDEO: Take a Virtual Tour of our Mill!
-
01/17/2025Reviews: What People are Saying About The Survival Sock!
-
09/13/2024Download A Free Handwear Informational Print Out!
Alpaca Coloring Pages
- Happy Memorial Day 2024: Alpaca's Grazing
- Winter #1: Build a Snowman Activity
- Winter #2: Extreme Sports
- Valentine's Day: Alpaca Wedding
- St. Patrick's Day: Leprechaun
- Spring: April Showers
- Summer: Beach Day
- 4th of July: Colonial Alpacas
- Summer: Farmer's Market
- Fall: Apple Picking
- Halloween #1: Costume Contest
- Halloween #2: Spooktacular Halloween
- Thanksgiving #1: Giving Thanks Activity
- Thanksgiving #2: Pilgrim Alpacas
- Christmas #1: Deck the Halls
- Christmas #2: Santa's Workshop
Alpaca Fact Series
Business Resources
- Article: Email is still a MUST DO for all Alpaca Farms
- Article: Off the Beaten Path Event Ideas on the Alpaca Farm
- Download: Sock Photo Download Folder
- Graphics: Shop Small this Holiday Season
- Article: Form Follows Function: Dressing for Fall and Winter 2020
- Graphics: Sock and Handwear Comparisons
- Article: A Change in the Seasons: Farms Continue to Adapt into the Busy Harvest Season
- Graphics: How to Support Alpaca Farms
- Graphics: Alpaca Fiber Properties
- Article: Customer Retention: Building Customer Loyalty for your Ecommerce Business
- Article: Harnessing Storytelling to Market Your Business
- Article: The New Normal and a Renewed Support for U.S. Alpaca
- Article: Use Gift Cards to Increase Sales
- Article: Virtual Farm Tours: Bringing People & Alpacas Together in the Virtual World
- Graphics: Get the Most out of your Fiber Harvest
- Graphics: Alpaca Knitter's Yarn Guide
- Article: Mike and Sean's Adventure in Retailing
- Article: Harnessing Holiday Sales Momentum into the New Year
- Graphics: U.S. Alpaca Holiday Gift Guide
- Graphics: Small Business Saturday Resources
- Article: Tools and Topics for Implementing Healthy Soil Agriculture
- Article: Successful Social Media Marketing for Alpaca Farms
- Article: Agritourism on the Alpaca Farm
- Article: Finding Success at Fall and Winter Markets
- Article: Brand Identity & Your Local Community
- Article: Social Media: Alpacas are STILL Seriously Trending
- Article: Let's Get Personal: Expanding your Inventory with Product Personalization
- Article: Part 2: Promoting your Brand Online through Product Styling
- Article: Promoting your Brand Online through Product Styling
- Article: 7 Old School Ways to Spread the Word about your Event
- Article: 5 Ways your Open House can increase Future Sales
- Article: Top Alpaca Related Hashtags to increase your Reach!
- Article: Alpacas are SERIOUSLY Trending
- Article: How to Utilize CO-MARKETING
- Article: Farmers Share their Booths and Tips
- Article: Mobile Payment Survey Results
- Article: Product Photography Do’s and Don'ts
- Article: Driving Business After the Holidays
- Article: Marketing Reflection and Planning
- Article: The Slow Alpaca meets Slow Fashion
- Article: Use Gift Cards to Increase Sales
- Article: The Importance of Being Mobile Friendly
Article: Promoting Your Brand through Product Styling and Photography - Part 2
02/07/2019
Part 2 of 2: Capturing and Editing Better Product Photos for the Internet
As we discussed in Part 1, product photography begins before you even pick up the camera. Great compositions rely on dynamic product styling, which can only be successful with some understanding of your brand, products, and target market. Once you have the perfect composition, you can move on to the technical part: product photography.
Taking Great Photos
While a DSLR camera is ideal for photographing products (and taking great shots of your alpacas!) the best camera is the one you know and understand. Recent advances in mobile technology mean you can rely on your phone to take decent photos. Regardless of the camera you choose, you can create simple backdrops at home without needing dedicated studio space.
All you need to take good flatlay and seamless photography at home are a few pieces of posterboard, a box, and a some objects you likely have around the house!
1. Flatlay Photography
You may be asking, what is flatlay photography? It is an extremely popular style of photography and one of our favorite techniques at NEAFP. You simply shoot your subject directly from above, with the lens parallel to the object. We used flatlay photography for our Cozy Baby Blanket photo, as well as many of the photos in our 12 Days of Christmas campaign. So, how can you achieve similar results?

Flatlay Photography Tips:
- Nature’s Finest: Utilize Natural Light. A large window or even an open doorway makes the best photo lamp. Diffuse the light with a plain white curtain or sheet, if needed. A piece of posterboard or foil wrapped cardboard can make a perfect light reflector.
- Backdrops Count: Place a piece of posterboard mat side up with the object you are photographing on top of it. Experiment with different backdrops: different colored paper, wood, or marble, to change the mood of the photograph.
- Posture Matters: Shoot the object from above. Use a stepstool to get above the object so that the lens of the camera is parallel to it.
Suprisingly Simple Flatlay Photography:
I took one our Mandala Magnets and put it to the test. Rather than shooting with the photo lights we typically use in the NEAFP photo room, I found a nearby window for some natural light. Using my cell phone (iPhone SE) and some cardstock and tape from my desk, I found I was able to take some decent photos!
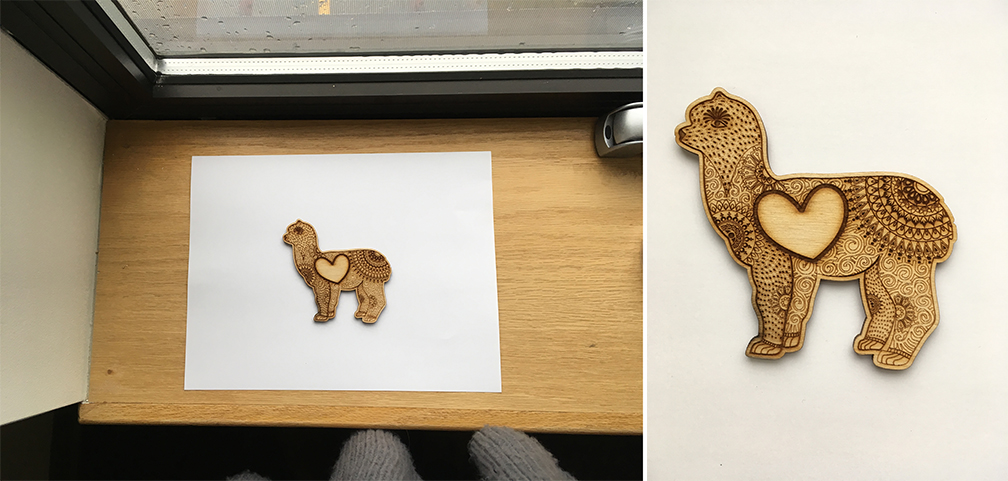
Here is my setup, next to a window. You can see that I am looking straight down at the Mandala Magnet. Even unedited, the magnet jumps right off the white background, but we can make it even better!
2. Seamless Photography
Seamless photography is best for objects that stand upright, or can be propped up. At NEAFP, we often use lightboxes made specifically for photographers that provide a seamless background on which we can shoot our photographs. We commonly utilize seamless backgrounds for our sock product photos, using mannequins to ensure that they stand upright.
Seamless Photography Tips:
- Get Swept Away: The most important part of seamless photography is your “sweep”: a piece of paper or white poster board that you tape up and let slope under your object, creating a seamless background.
- Shine On: Again, lighting is key to getting your photos “right.” Find a place in your house with good natural light, or utilize lamps if you are using a homemade light box.
- A Little Redirection: Make sure you keep a piece of posterboard or foil wrapped cardboard handy to use as a light reflector.
Suprisingly Simple Seamless Photography:
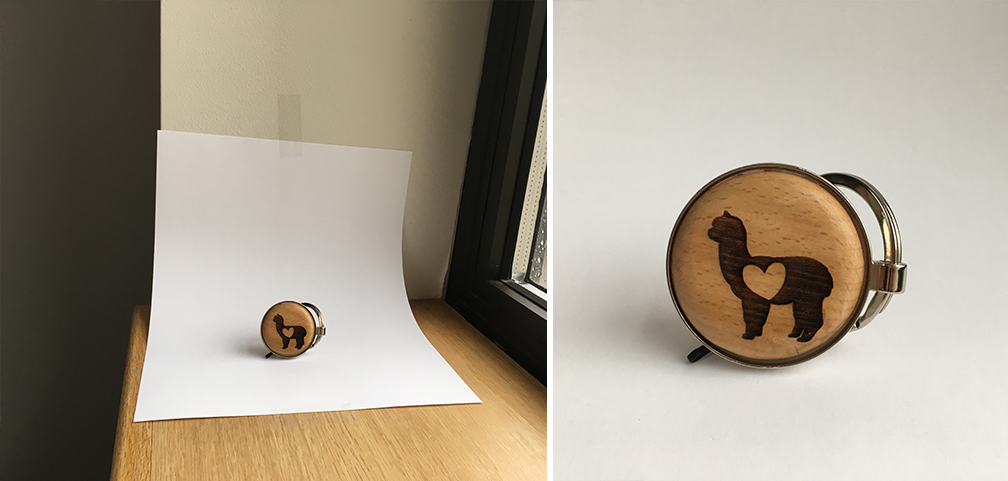
This time, we moved our cardstock to the wall to create a gentle "sweep" for our Alpaca Keychain to sit on. You can see that the paper makes a perfect background with nothing to distract the eye from your product!
If you’d like something a little more permanent, a cardboard box can be converted into a great seamless lightbox by putting in parchment paper light panels! Even without a cardboard box, you can still make a photography sweep to take product photos.
3. Don't Forget to Edit!
After you’ve taken your photos, it’s easy enough to post them on your website or social media. Taking a few minutes to edit your photos can make a world of difference!
- Crop it: Regardless of the camera or software you have at your disposal, crop your photos!
- Just the Right Bright: Basic editing software will allow you to adjust the brightness and contrast of your photographs. Your final photos should be bright but not washed out and have no distracting shadows.
- Experiment: Play around with the settings on your editing software (or even your phone) to increase interest and clarity in your product photos.
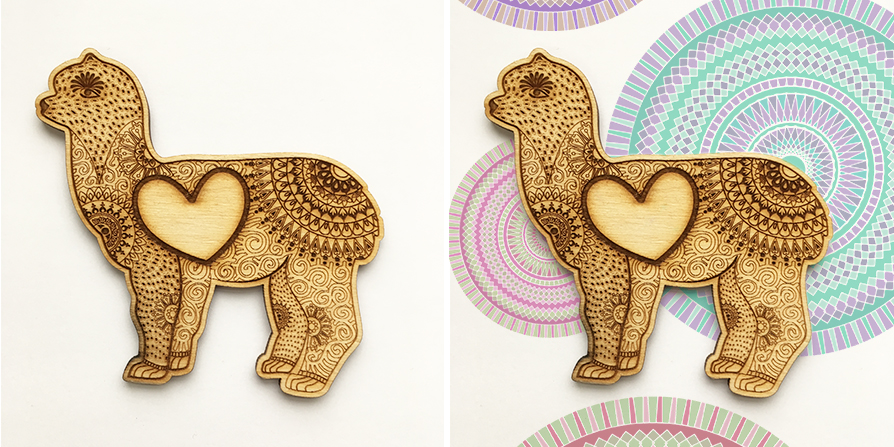
I brightened up the original Mandala Magnet photo in Adobe Photoshop, the leading software for computer graphics editing. I could have also used my phone interface to make simple lighting adjustments, but since I wanted to add the mandalas to the photo background, I edited the brightness and contrast directly in Photoshop.
Although Photoshop is considered the standard in editing software, there are now some great (free!) alternatives available like Pixlr. This web editor is by far the most powerful free Photoshop alternative you'll find. Pixlr is easy to use and has many of the heavy-hitting editing tools that you can usually only find in paid programs.
What now? Take some photos, experiment, and have fun! Combine what you learned about your brand, and then style and shoot some awesome photographs without expensive equipment!
We hope that these Business Resource Blog Posts have been helpful. Is there a topic you'd like us to cover in a future post? Write to us at support@neafp.com